


Graphical User Interface (GUI):
Windows provides a graphical interface with windows, icons, buttons, and menus, making it easier
for users to interact with the system.
Example: The Start Menu in Windows 10/11 allows quick access to applications and settings.
Multitasking:
Windows allows users to run multiple applications simultaneously, switching between them effortlessly.
Example: You can have a web browser open while also using a word processor like Microsoft Word at the same time.
File Management:
Windows has built-in tools like File Explorer to manage files and folders, making it easy to organize and access data.
Example: You can create, delete, move, or copy files between folders using the File Explorer.
Hardware Compatibility:
Windows supports a wide range of hardware devices like printers, cameras, graphics cards, and
external drives, often without requiring additional drivers.
Example: Plugging in a USB drive into a Windows computer usually requires no extra software to start using it.
Security Features:
Windows OS includes built-in security features like Windows Defender,
firewall, and user account control (UAC) to protect against malware and unauthorized access.
Example: Windows Defender automatically scans your computer for viruses and malware.
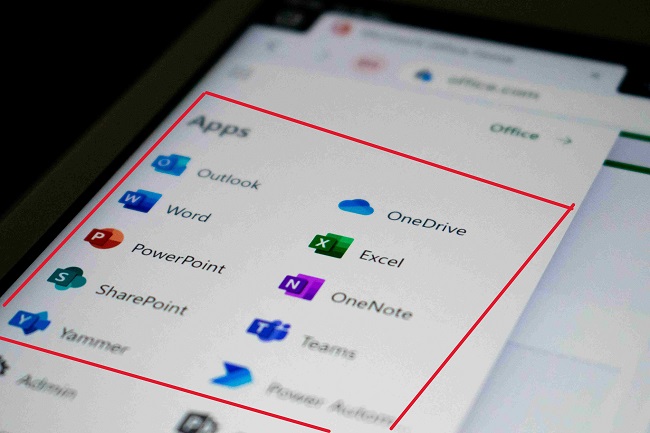
Software Compatibility:
Windows supports a vast range of software applications, from productivity tools (Microsoft Office)
to entertainment software (games, media players).
Example: You can easily run popular programs like Adobe Photoshop, Chrome browser, or video games
like Minecraft on a Windows machine.
Customization Options:
Users can customize the appearance and behavior of the interface, such as themes, wallpapers, and system settings.
Example: You can change the desktop background or adjust the taskbar color in Windows 10/11.
Networking:
Windows OS supports network connectivity, enabling devices to share resources and connect to the internet.
Example: You can easily connect to Wi-Fi or a local network to share files between computers.

User-Friendly Interface:
The GUI makes Windows easy to use for both beginners and advanced users.
Example: The simplicity of navigating through the Start Menu or using touch gestures on a Windows laptop is ideal
for people of all skill levels.
Widespread Compatibility:
Windows supports a large variety of hardware and software, which means users can run nearly any
type of program and connect to various devices.
Example: Windows is the default operating system for many software programs and peripherals, such
as printers, scanners, and cameras.
Strong Support and Updates:
Microsoft provides regular updates for Windows OS, fixing bugs, improving security, and adding new
features.
Example: Windows 10/11 regularly receives updates to improve system performance and security.
Enterprise-Friendly:
Windows OS is widely used in businesses, offering tools for management, security, and networking,
making it ideal for professional environments.
Example: Windows Server editions are used in data centers to run enterprise applications and
services.
Gaming Platform:
Windows is a popular OS for gaming due to its support for high-performance graphics, gaming peripherals,
and a large game library.
Example: Popular games like "Fortnite" or "Call of Duty" are optimized for Windows OS.
Large Community and Support:
Windows has a massive user base, meaning that there is a wealth of online resources, tutorials,
forums, and customer support.
Example: If you encounter a problem with your Windows computer, you can often find a solution
online, whether through Microsoft's support site or user forums.
.jpg)
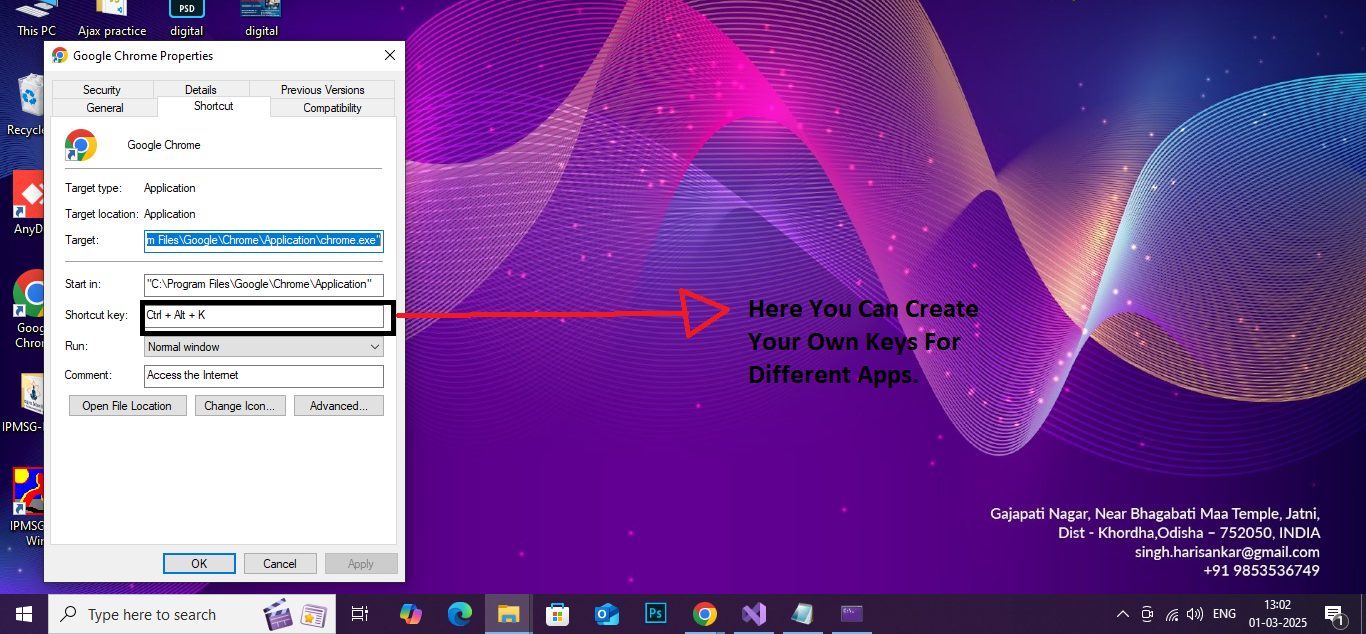
Windows allows you to create custom keyboard shortcuts to launch applications.
Steps:
Right-click on the application (or its shortcut) you want to create a shortcut for.
Select Properties.
Under the Shortcut tab, click the Shortcut key field.
Press the key you want to use for the shortcut. It will automatically add Ctrl + Alt + to your chosen key (you can pick letters, numbers, or function keys).
Click Apply, then OK.
Now, you can use the keyboard combination to open that application.
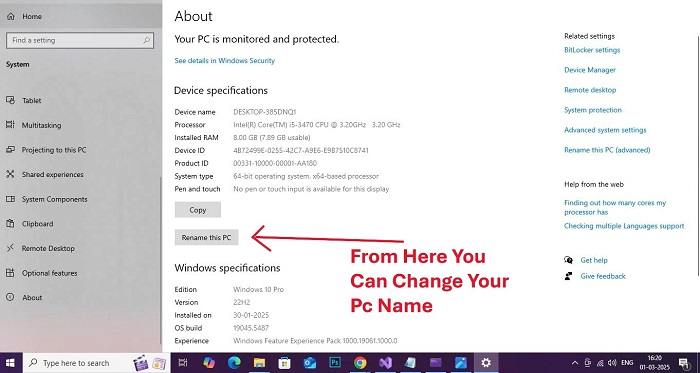
Open Settings:
Press Windows + I to open the Settings menu.
Go to System Settings:
In the left sidebar, click on System.
Scroll down and select About at the bottom.
Change PC Name:
Under the Device specifications section, you’ll see the PC name.
Click on the Rename this PC button.
Enter the New Name:
Type the new name you want for your PC.
Click Next.
Restart:
Windows will prompt you to restart your PC to apply the changes.
Click Restart Now to complete the renaming process.
For Windows 7 and Windows 8/8.1
Open Control Panel:
Press Windows + R, type control, and press Enter.
Go to System and Security:
In the Control Panel, click System and Security, and then select System.
Change Computer Name:
In the System window, click Change settings next to your computer name.
Rename:
In the System Properties window, click on the Change button.
Enter the New Name:
Type the new name for your PC in the Computer Name field.
Click OK, then restart your computer to apply the changes.
You can also change the computer name via Control Panel:
Open Control Panel (press Windows + R, type control, press Enter).
Go to System and Security → System.
Click on Change settings beside the computer name.
In the System Properties window, click Change and enter the new name.
After restarting, your PC will have the new name.
Let me know if you need further help with this, please comment below....!
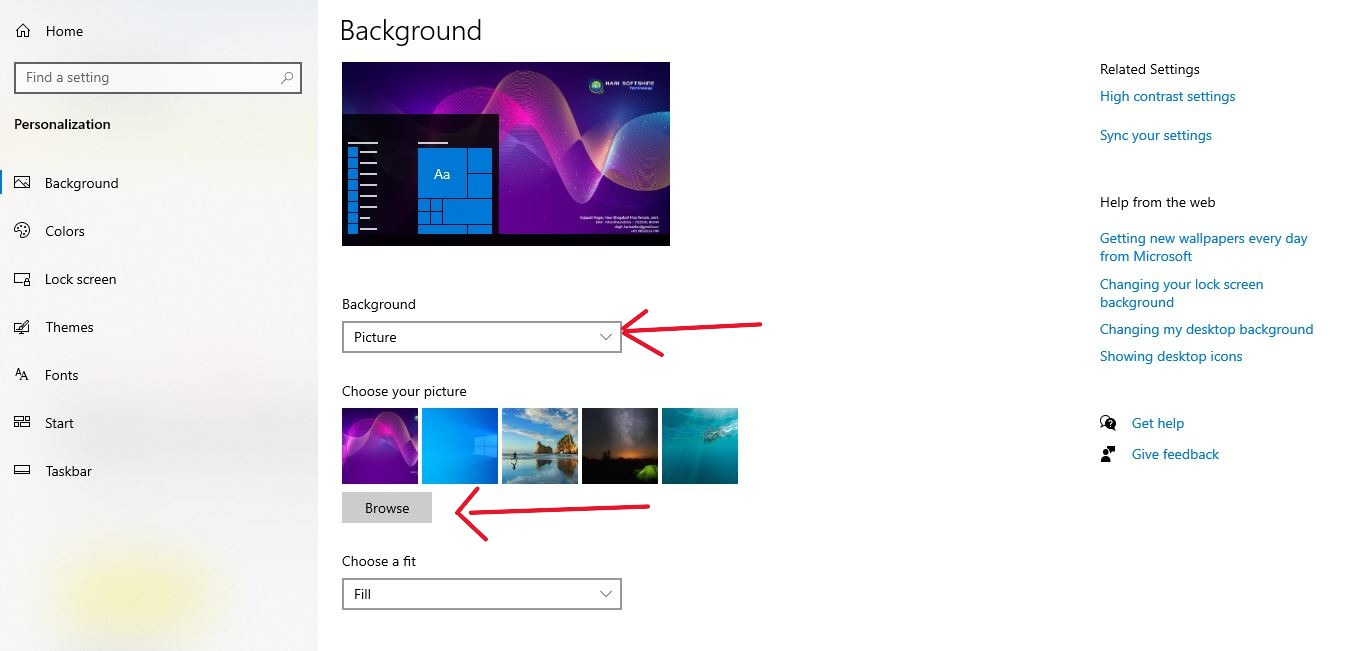
Open Settings:
Press Windows + I to open Settings.
Go to Personalization:
In the Settings window, click on Personalization.
Select Lock Screen:
In the left sidebar, click on Lock screen.
Change Background:
Under Background, you can choose between three options:
Picture: Choose an image from your computer or browse to a new image.
Slideshow: Choose a folder with multiple images, and Windows will show a rotating slideshow on the lock screen.
Windows Spotlight: This option automatically changes the background with images provided by Microsoft.
Apply the Background: Select the desired option, and it will be applied immediately.
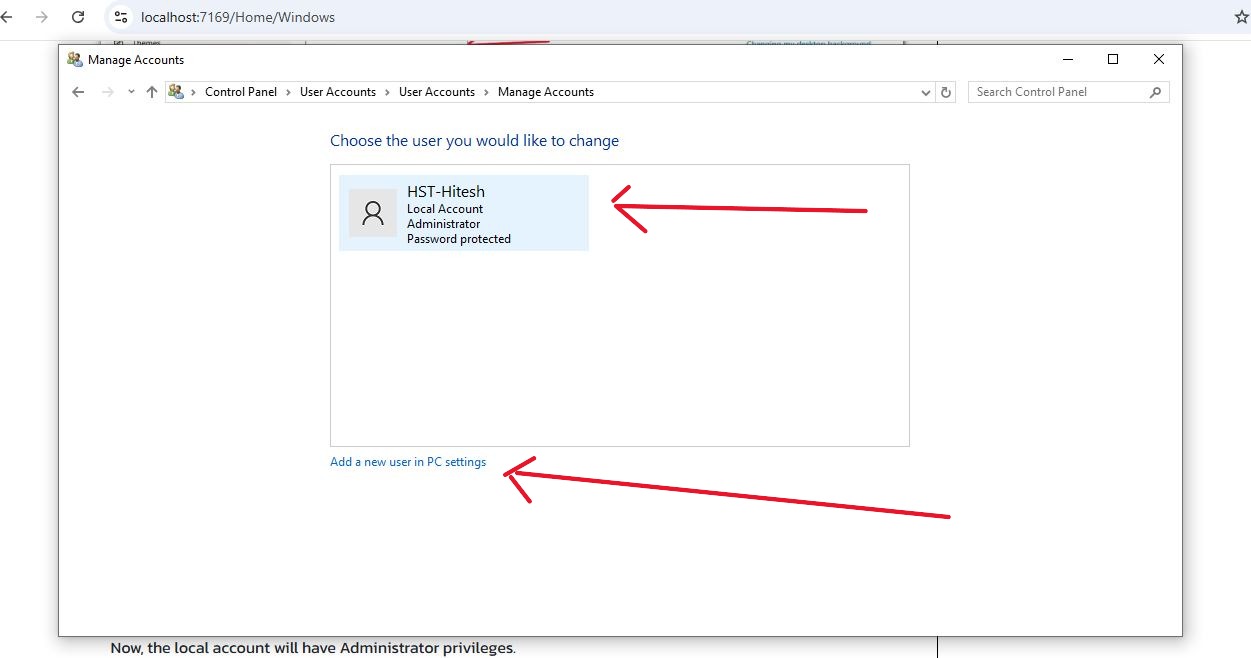
Open Control Panel:
Press the Windows key, type Control Panel, and press Enter to open it.
Go to User Accounts:
In the Control Panel, click on User Accounts.
Change Account Type:
Click on Manage another account.
Find and select the local account you want to change to an administrator.
Change Account Type:
Click Change the account type.
In the next window, select Administrator.
Click Change Account Type to apply the changes.
Now, the local account will have Administrator privileges.
Confirm:Open Computer Management:
Press the Windows key + X, then select Computer Management from the menu.
Alternatively, press Windows + R, type compmgmt.msc, and hit Enter.
Confirm:Navigate to Local Users and Groups:
In the Computer Management window, expand Local Users and Groups in the left panel.
Confirm: Select Users:
Click on the Users folder.
Confirm:Change the Account Type:
In the middle pane, right-click on the user account you want to change and select Properties.
In the Properties window, click on the Member Of tab.
Click Add... to add the account to the Administrators group.
In the Enter the object names to select field, type Administrators and click Check Names, then click OK.
Confirm:
Click Apply, then OK to confirm the changes.
The account will now have Administrator privileges.